SocBoxCore™ (SBC) Software Documentation
Installation:
This will go over the SBC software installation process and attempt to answer any questions regarding installing the SBC software.
Important - this install process covers installation on a ® cPanel and ® CentOS configured server and
should also work with ® Plesk and other similar server software configurations as well. Also with CentOS 7 Linux EOL (End Of Life) expected
next year (as they focus on other ventures), this should also install on most any other comparitable Red Hat or Linux Distro. Red Hat has
discussed this topic here CentOS Linux EOL
At this time we do not support any of the AMP server configurations. We have briefly tested SBC on a LAMP server and it seemed to
install with no issue. However, that was early in development and we no longer have that test environment. Due to the differences in how LAMP
and other AMP server software's structure their directories (and other reasons), we are not able to support any of the AMP environments. Here
is a list of the AMP environments AMP packages,
all of which are NOT supported by SBC. Now if you install the software and it works on one of those environments then that is awesome. But we
do not support AMP environments. One of the main issues is consistency, those server configs are just not consistent enough across the board
for my high expectations.
Step 1 - Upload and Extract
-
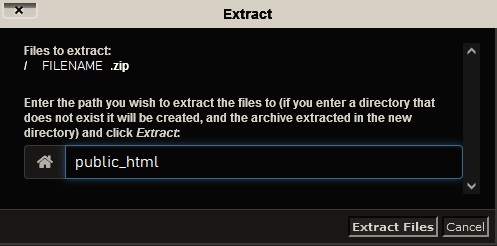
Simply upload and extract the zip file into the directory you want to install the software ie public_html, sub folder or sub domain. Please DO NOT unzip the file "into" anywhere "above" the public_html directory. When you open the public_html or sub directory using file manager after you have extracted the files you should see the install, ® ionCube, and core folders, that means you did it correctly. Please be sure that your folders are set to 755 and your files are set to 644. If you have a standard config server you should be ok.
FYI (in simple terms) the difference between a sub folder and a sub domain is that the sub domain has its own DNS and appears something like example.example.com where as the sub folder is just a sub folder with files in it such as example.com/example.php
Due to the complexity of features in our social core design we really recommend that this software be installed either in public_html or in a sub domain.
Step 2 - Modify .htaccess file
-
Open up the directory that you just expanded the zip file into with your file manager and edit the .htaccess file. In the .htaccess file you will modify line 35 or the line that looks like this:
        #local php ini file
        lsapi_phpini /home/username/example.com/php.ini
and replace username with your cPanel or other panel username, and replace example.com with your domain name. This is assuming you are installing the software inside the public_html folder. If you are installing it inside a different folder then edit the location parameters in the code accordingly. This should dial the software in to use the local php.ini file that we have included with the software. If you get a server error, then just ask your host if they would add mod_lsapi to your server. If they will not add it then just place a # in front of that code, just like the code line above it as an example. That will comment out code in a .htaccess file. It is a mod that provides great data processing advantages and is perfectly designed for a social or community web site.
If you do not have this module it is not a necessity, it is just that it makes PHP run better.Scroll down in the same .htaccess file and edit line 57 or the line that looks like this:
ErrorDocument 403 https://example.com/index.php?e=403
and replace example.com with your domain name. Again this is assuming you are installing the software inside the public_html folder. If you are installing it inside a different folder then edit the location parameters in the code accordingly. This should set up the custom error document for 403 which just means that we have included a custom 403 error document in which the display of 403 errors is alittle more presentable to the user.As long as your server supports Options +FollowSymLinks then you can "SAVE and CLOSE" the .htaccess file.
Step 2 - Modify php.ini file
Next you will need to edit the local php.ini file that we included with the software. This file is in the same dir you just edited the .htaccess file, just scroll down, you will find it. Modify line 28 or the line that looks like this:
error_log = '/home/username/example.com/error_log'
here is where you have a choice. This will tell the server where you want your server error log to be. This will effect the other domains you have on your server if they do not have the same code in their php.ini file. So you have several options here:
Option 1: You can comment out this line of code by placing a ; in front of it like so
;error_log = '/home/username/example.com/error_log'
which tells the server to ignore that line of code (but only use ; in a php.ini file, it wont work in other file types). This will let the default server config main php.ini that you cant see (its not local) take control of where the error_log will be. You will need to either ask your host where the default error_log file is or you can just create a server error and then find out where that file is located so you can check it. Please never let your error_log just sit unmaintained and get larger and larger, clean it out once in a while, at least 1x a week. If you are having errors the file will get so huge that you will not be able to open it.
Option 2: You can choose another location for it, basically where ever you want, but remember that if you have other domains and they do not have that line of code, all errors from those domains will go where you code the location at.
If you decide to keep the code then replace username with your cPanel or other panel username and replace example.com with your domain. Again you can edit the code if you are installing in a sub dir or you can leave it set to the main domain.com dir (public_html).
Next scroll down and find line 41 or the line that looks like this:
;zend_extension = /home/username/public_html/ioncube/ioncube_loader_lin_8.1.so'
If your server requires the zend_extension for ® ionCube then you will uncomment the line (remove the ; in the front) and modify the location to so that it points to the ® ionCube folder we have provided you in the software. Otherwize leave it alone and don't change it at all (leave it commented out).
Go to line 50 in the same file or find the code that looks like this:
date.timezone = America/Chicago
and modify the date.timezone to your date timezone value. You can find a list of timezones at this link Timezones
Now "SAVE and CLOSE" php.ini
With all the file modifications done you are now ready to begin the install process.
Step 3 - Run the Install
-
Visit the domain location (where you uploaded the software) in the browser ie. example.com or example.com/example or example.example.com whichever it may be. There is no need to use /install (like other software's do) With our install, just visit your domain directly.
You should see a screen that looks similar to the image below.
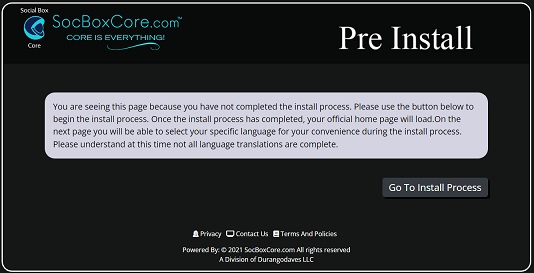
Please be sure that your SSL certificate for HTTPS and ® ionCube have already been installed on your server, and that you have already created a new database and database user and that you have that information handy. We do include a default ionCube folder with the software because many hosts install out of data really old versions of ® ionCube when asked to install it. We have removed the wizzard file from the ® ionCube folder so that the public cannot run that file. If you need to run the ® ionCube install wizzard you can download the wizzard from the ® ionCube site or we can give you a copy. If you have not met all the requirements on this page Requirements You may need to modify your server and or the .htaccess file and or php.ini file to fine tune your server config. Please show the list of requirements to your host to be sure your server has everything you need.
When you are ready to begin press the "Go To Install Process" button to continue to the next page of the pre-install process. Which should look like the one below.
-
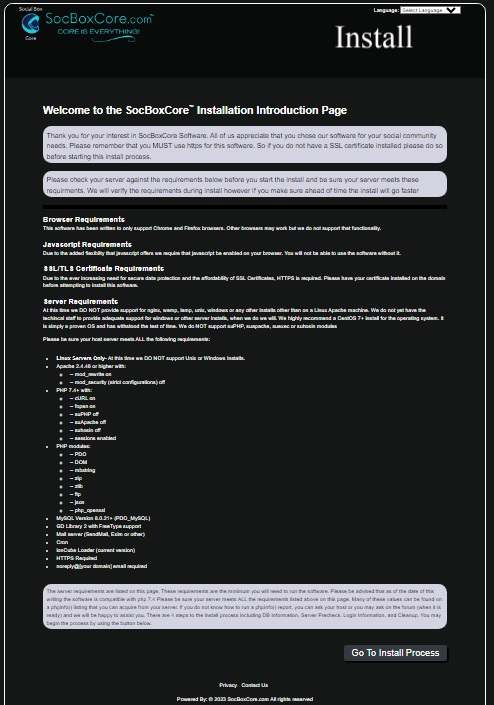
The page above goes over in more detail what requirements you need and also what to do if not every single requirement is met (see bottom paragraph on that page). There is a utility that will check most of the basics later in the install process. When you are ready press the "Go To Install Process" button.
The next page should look like the image below.
-
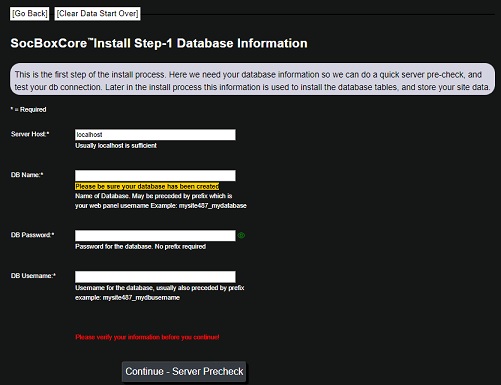
The next several pages if you get stuck or you want to change your mind on something you can use the [Go Back] link at the top of the page to go to the previous page. You can also click the [Clear Data Start Over] link which will take you back to the beginning of the install process.
On this page you will enter your server host (most of the time it is just localhost) so just leave the default value. Then you will enter your database name, database password, and database username. Please remember that on many servers both the database name and database username have a prefix value such as xxxxxxxx_username and xxxxxxxx_databaseName. These values are typically your cPanel or other panel Username
Then click the "Continue-Server Precheck" button. If you get an error it most likely is that you did not enter the prefix_ value or you did not enter the correct databaseName, database username or database password. Check your error_log to be sure that is the case. It could be something else.
If all the information is correct you should get the next page which is the Server Precheck Page. Which should look like the image below.
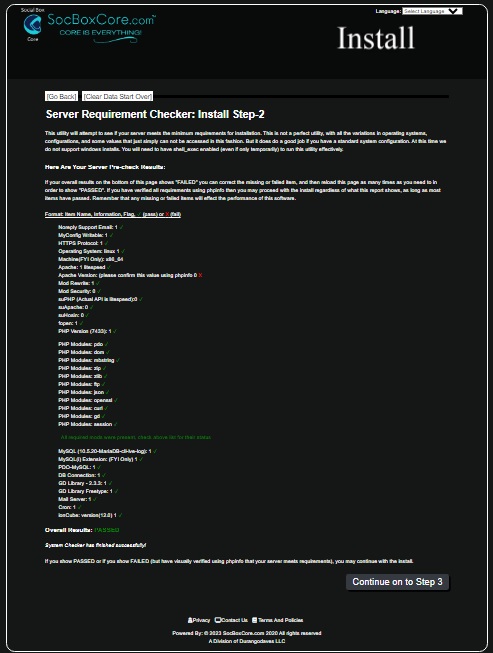
-
This page executes the server check utility when it loads. You will see a green checkmark ✔ when things pass and red X when things don't pass. The data column headers for the data are:
Item Name (requirement name) | Information (if there is any special information) | and the Flag (pass or fail)It is important to remember that this is not a perfect utility, if the utility does not have enough access to check the requirement it will show fail. It will have some false failures. Remember we are trying to check a server with limited access to the server so there are bound to be some good and bad results. The key factor is on the bottom you will see "Overall Results:. If that says "PASSED" then you are good to go. If it says "FAILED" then that means there were not enough passes to pass overall. You need to verify that what failed is there, or contact your host, or correct the server yourself and run the report again. To run the report again just refresh the page. If you have verified that whatever failed is actually there then continue to the next page.
If you are ready to continue then press the "Continue on to Step 3" button which is where all the magic happens. You should see a page like the image below.
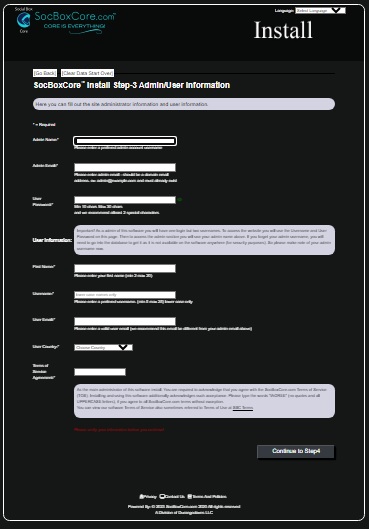
-
On the page above is where you enter your username and admin information:
-
Admin Name: - The name you want to access the admin area with This MUST be different than your username below.. Remember this is your access to the admin area and this name will never be displayed anywhere on the user facing pages, only in admin area. If you forget this name you will have to look in the database for it (this is for security purposes).
-
Admin Email: - The admin email address.
-
User Password: The user password.
-
First Name: Your first name.
-
User Name: The username you want to login with (as a user - not admin). This MUST be different than your admin name above.
-
User Email: Your normal user email address
-
Country: Your country.
-
Type IAGREE in the box if you agree to the terms.
When you are ready to proceed click the "Continue to Step4" Button. The next page should look like the image below.

-
-
Congratulations! you made it! Nice job! now all we need to do is do the cleanup. This renames some files and just does some general cleanup of the site before loading your new index page.
Please take the time to read this page as it has important information. Remember if you have any questions about the install now is the time ask because once you do the cleanup then the only way to change things is to do a whole new install.
When you are ready to proceed click the "Begin Cleanup Process" button. The next page should be your new site main page, isn't it beautiful! It should look like the image below. You will get an email at your admin email welcoming you to the software and asking you to read the readme.md file and remove the install file and one other file.
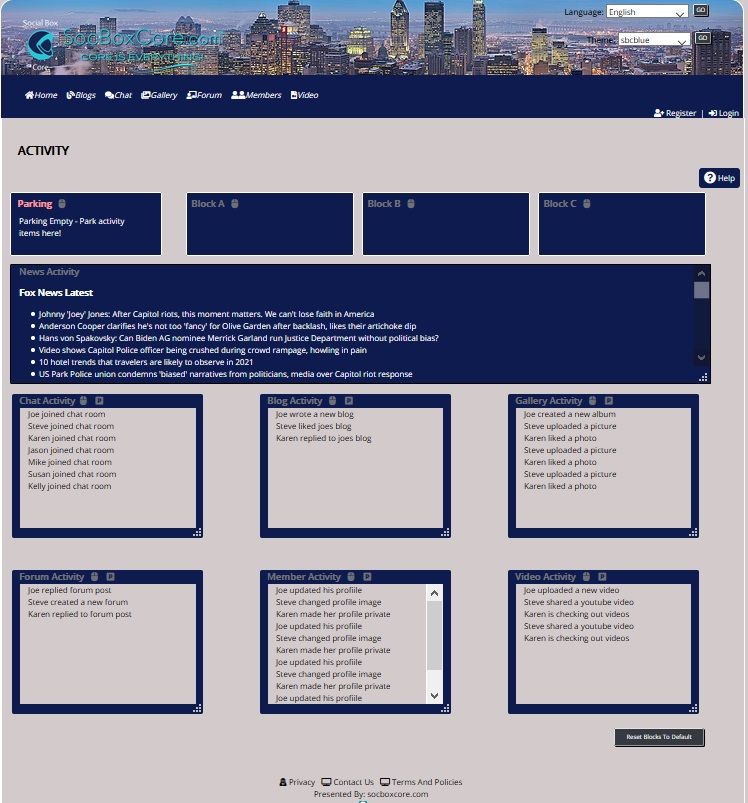
-
Now let that new main page sit for a moment as there are a few after install things you need to do such as removing the install file and some other quick tasks.
Please refer to the After Install Documentation
Installation is complete.
cPanel is a registered trademark and copyright of cPanel LLC
Plesk is a registered trademark and copyright of Plesk international GmbH
WAMP is a trademark and copyright of WampServer.com and author Romain Bourdon
ionCube is a registered trademark and copyright of ionCube Ltd
Zend is a registered trademark and copyright of Zend By Perforce